NSX-T Upgrade
Upgrading of NSX-T is a client responsibility and should be done on a schedule as defined by the client.
To perform an upgrade several two tasks need to be performed. They are:
- Download the update bundle from VMware.
- Perform Upgrade
Step One: Download the update bundle from VMware.
The first task is to retrieve the updates from VMware. To do so:
- Using a browser from a system that will be the same one you will do the update from, go to https://www.vmware.com.
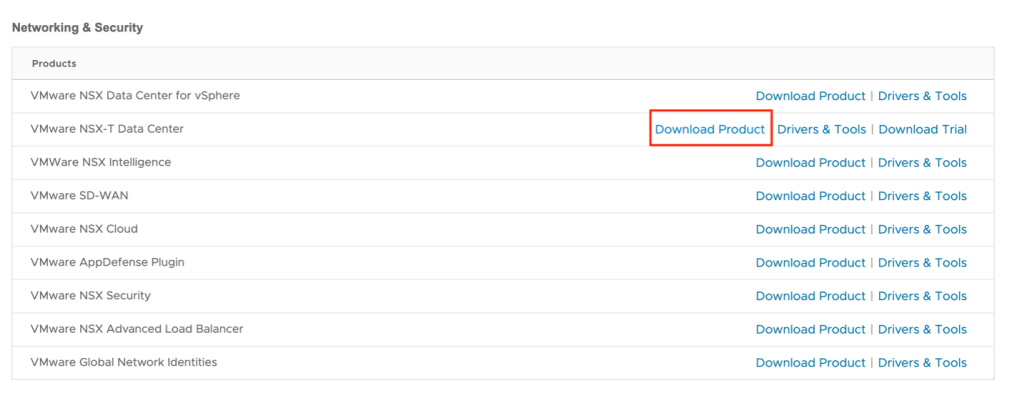
- From the menu select Resources Product Downloads.

- Scroll down until you see VMware NSX-T Data Center and click on Download Product.
- Click on Go To Downloads for the version of NSX-T that has been deployed in your instance. If you are not sure which version is installed, you may find this information on the Summary page of your instance in the IBM Cloud portal. In the example VMware NSX Data Center Advanced is used.
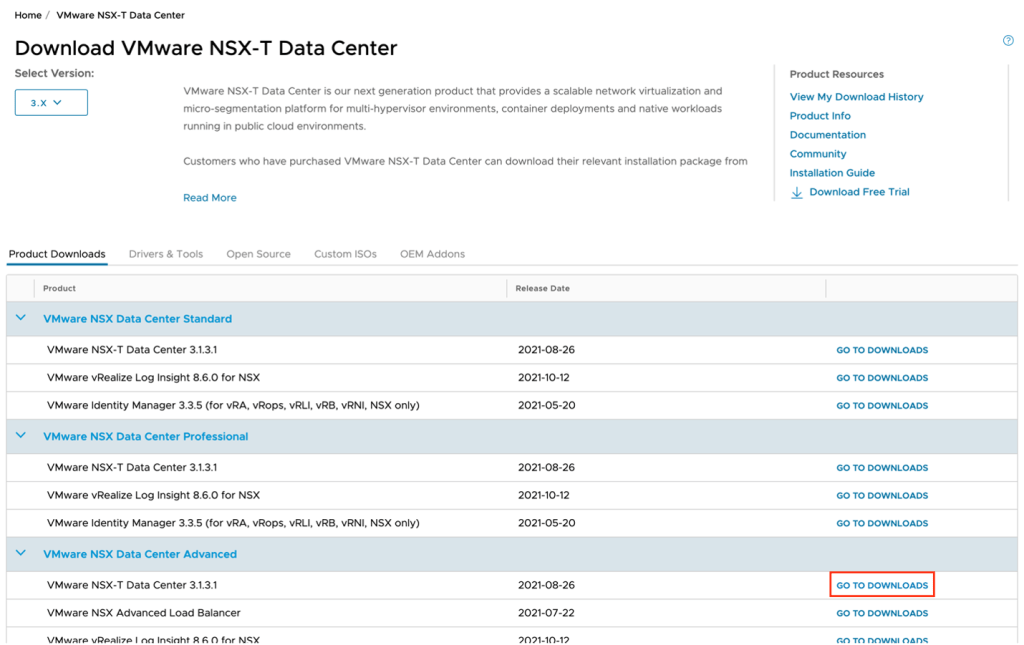
- Scroll down until you see NSX <version> Upgrade Bundle and click Download Now. At the time of writing NSX 3.1.3.1 was the latest version.

- You will be prompted to log into VMware with your account. If you do not have an account, then you will need to create one at this time.
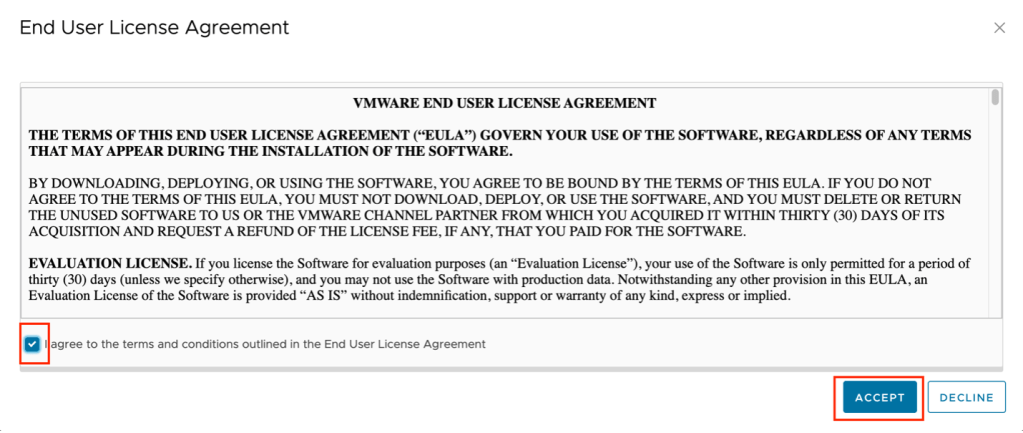
- Check the box to agree to the terms and conditions and click Accept.
- The download of the upgrade bundle will begin.
Once the download is complete move on to the next step.
Step Two: Begin Upgrade
The next step is to begin the upgrade process.
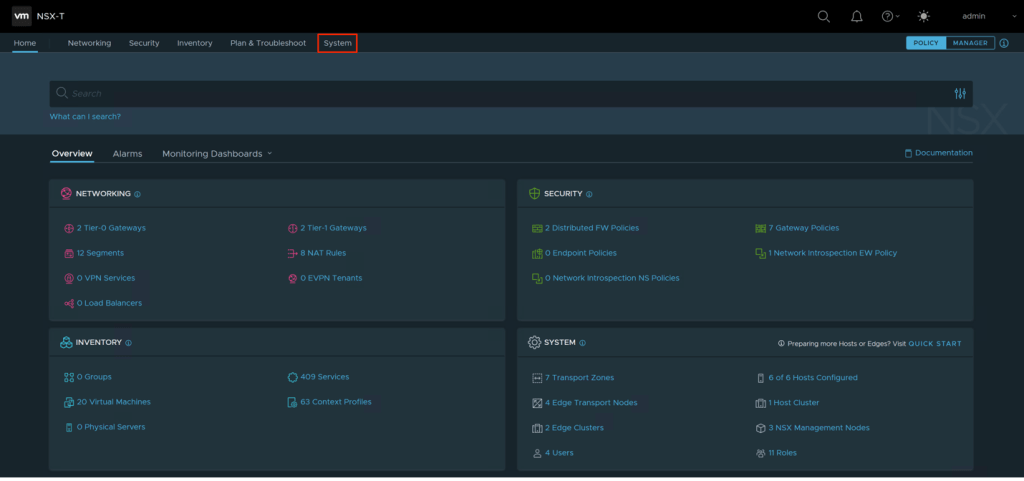
- Using the IP address and credentials from the IBM Cloud portal for your instance, log into NSX Manager.
- From the home page click on System in the menu bar.
- In the left-hand navigation click on Upgrade.
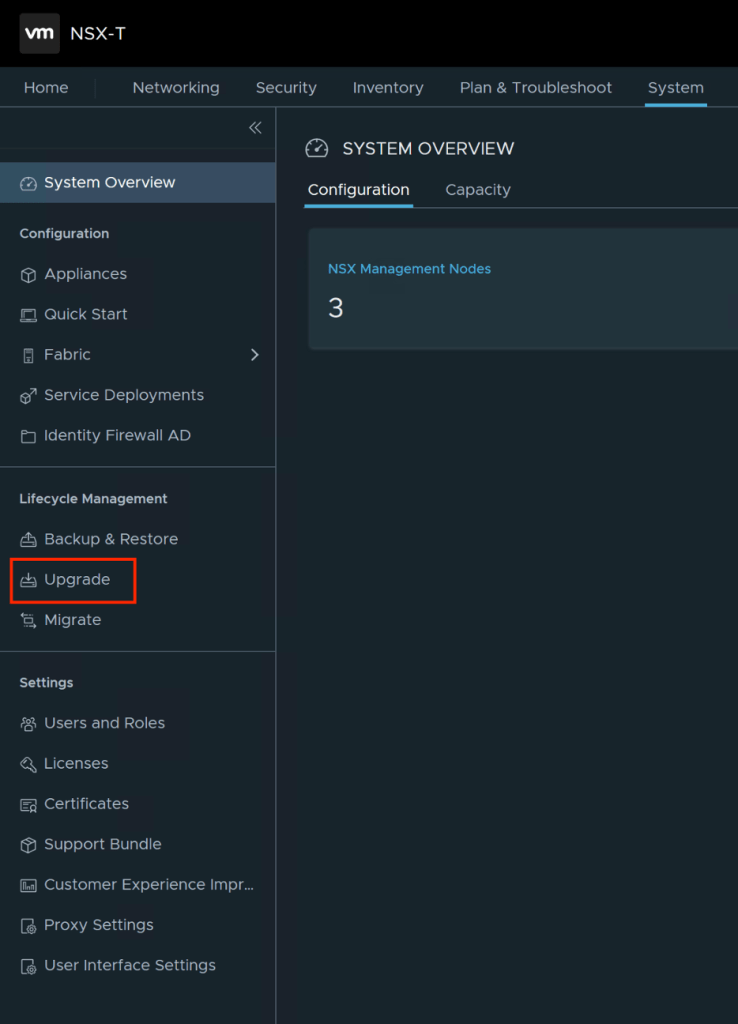
- Click on Upgrade NSX.

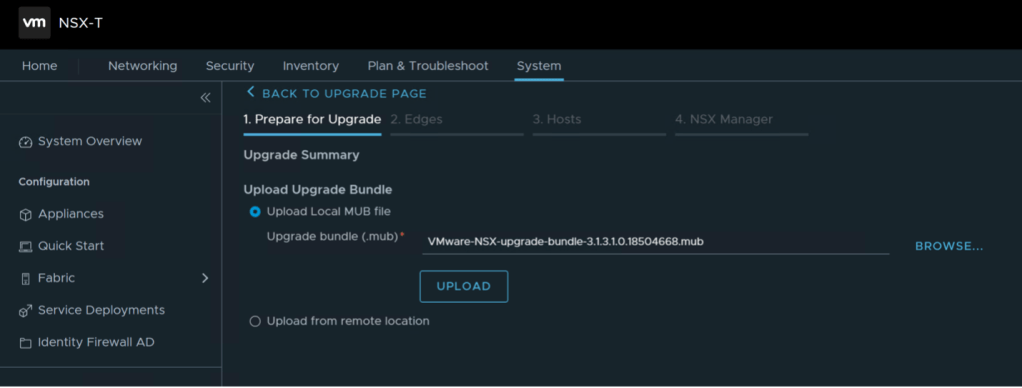
- The upgrade wizard will appear. Change the source from remote location to upload Local MUB file and click Browse to select the file you downloaded in step one. Then click Upload. It will take several minutes for the file to upload to the NSX Manager and be extracted and verified.
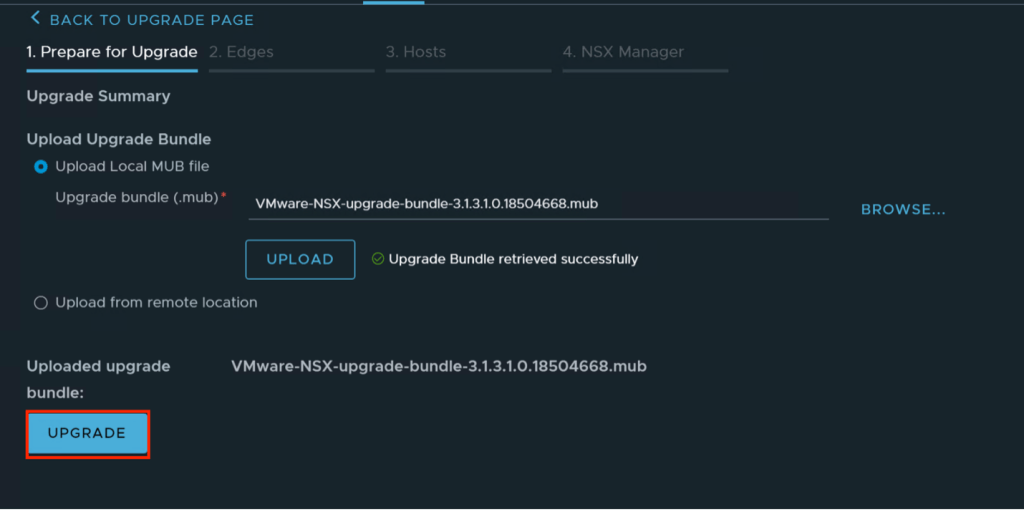
- Once the bundle is retrieved successfully an upgrade button will appear. Click the upgrade button to continue.
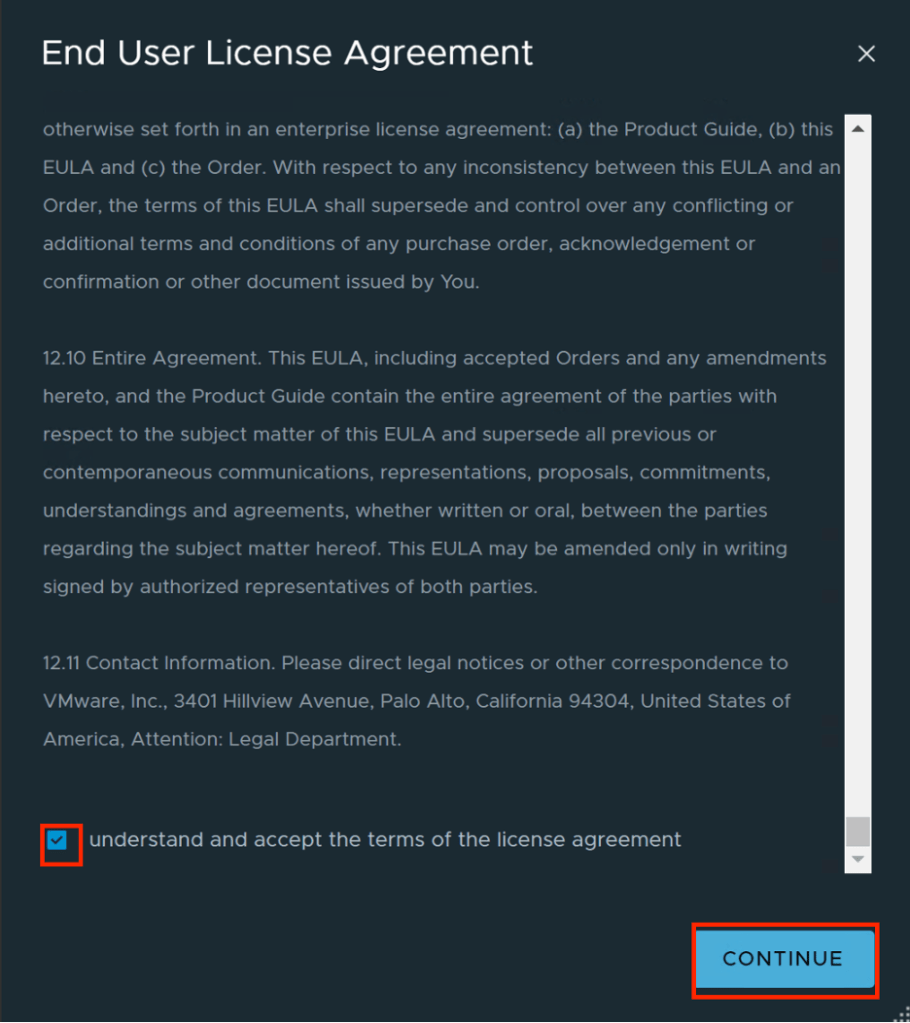
- The end user license agreement will pop-up. Scroll down until you see the checkbox to accept the agreement. Check the box the click continue.
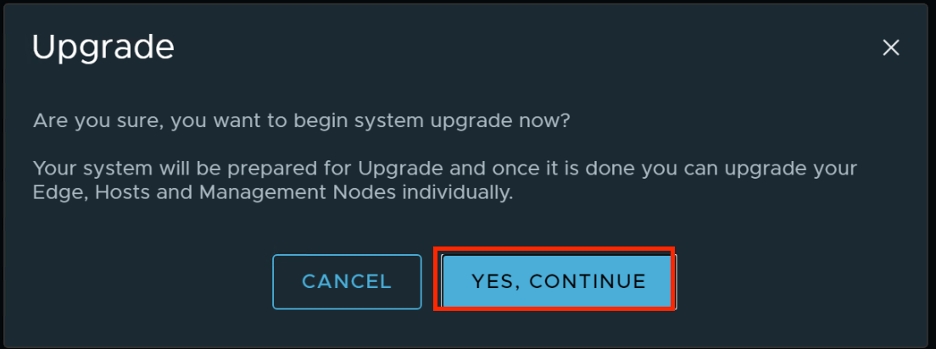
- A new window will appear asking if you wish to begin the system upgrade now. Click Yes, continue to continue.
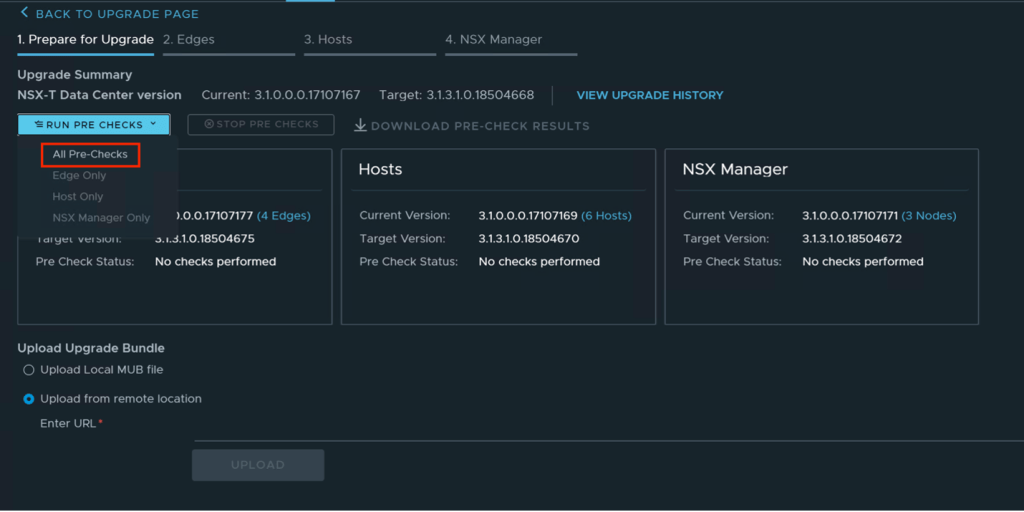
- The screen will change, showing the upgrade package has been prepared. Before performing any upgrade we need to run the pre-checks on the environment. Do to so, click Run Pre Checks and select All Pre-Checks.
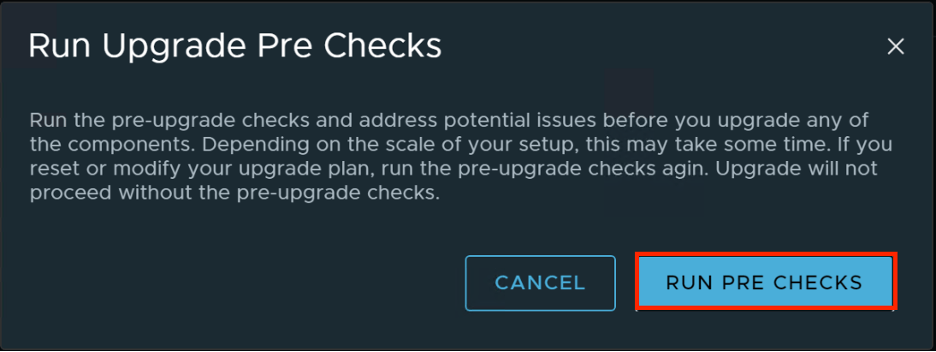
- A new window will appear confirming your selection. Click Run Pre Checks to continue.
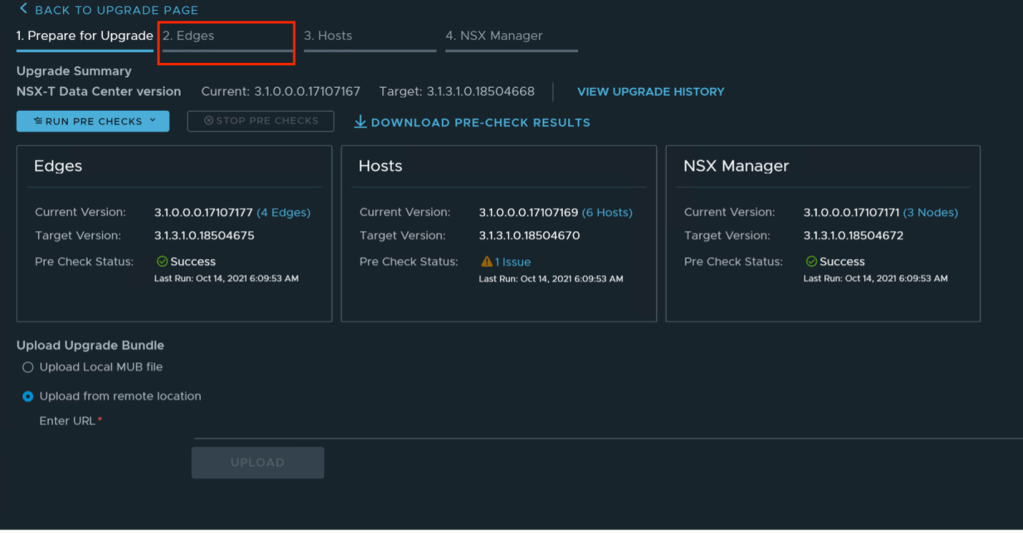
- A pre-check will be done against the environment. Note any warnings or issues presented and resolve. If you are unsure on how to fix the issue contact IBM Cloud Support. In the example below one warning is shown on the clusters hosts.

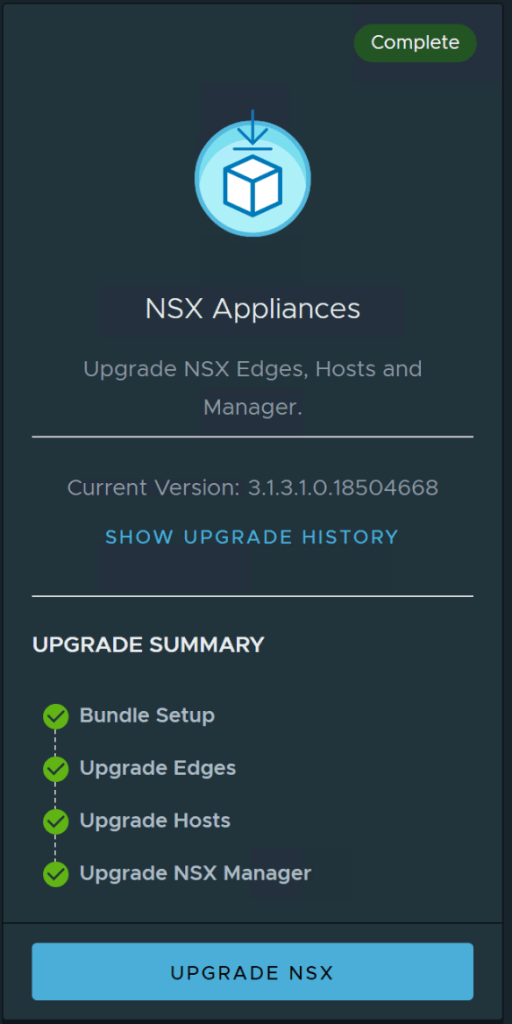
- When ready to continue and all issues are resolved or known click on Edges.
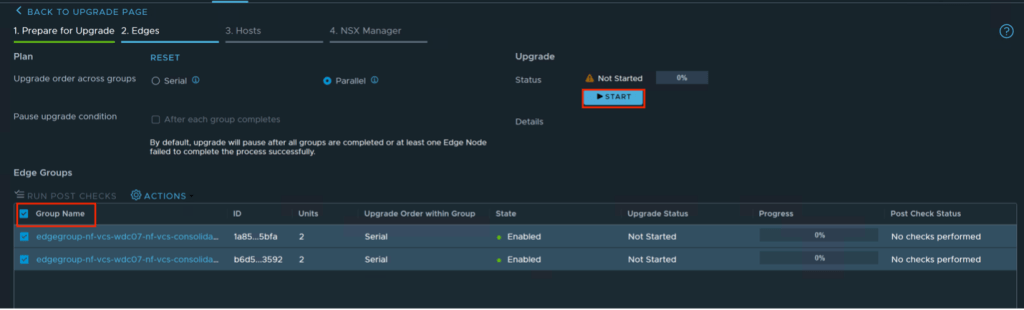
- The next step is to upgrade the edge nodes. Click on the checkbox next to Group Name to select all the edges, then click on Start. The status will change to in progress and the upgrade will begin. This upgrade will take several minutes to complete and the page will refresh throughout the upgrade. Several notifications will appear during the upgrade, these can be safely ignored.
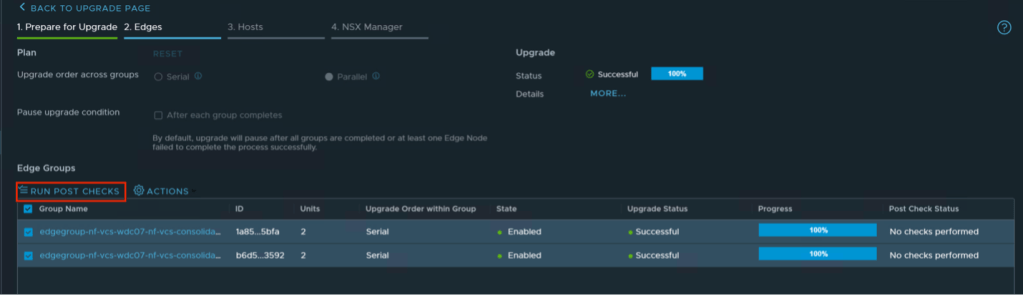
- Once complete the upgrade status will change to successful. Click on run post checks to ensure there are no issues.
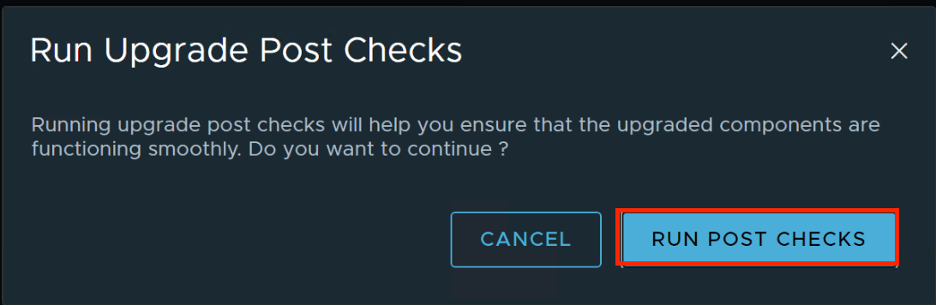
- A new window will appear asking you to confirm running the post checks. Click on run post checks to continue.
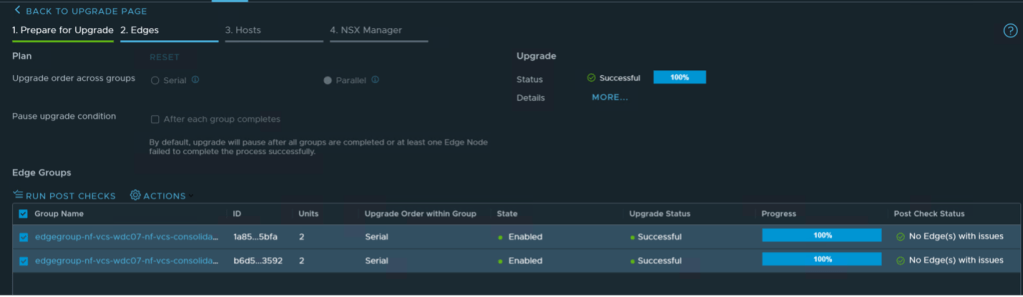
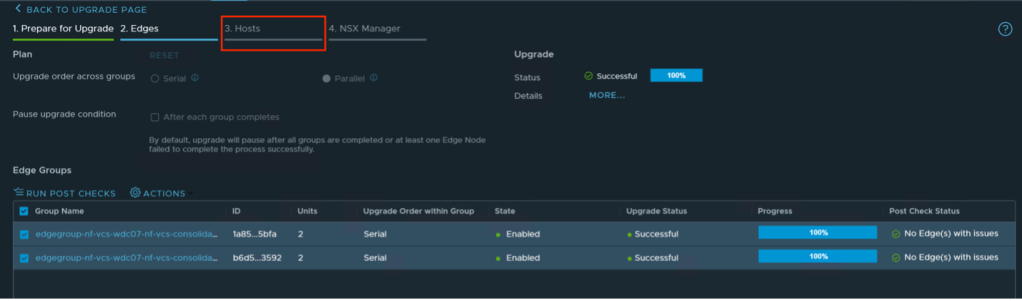
- Once complete if no errors are found the post check status will show No Edge(s) with issues. We are ready to move to the next step.
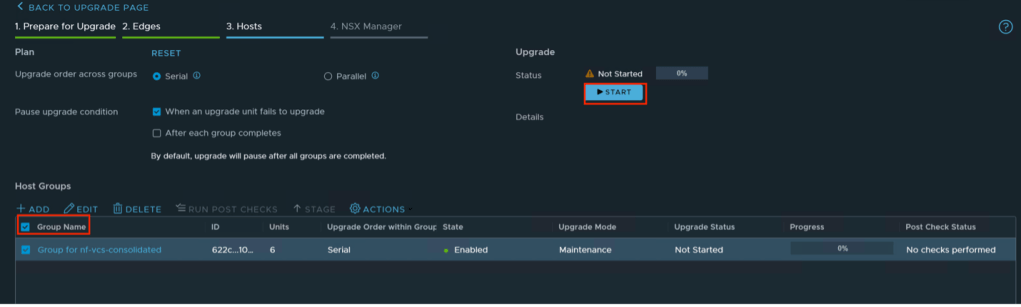
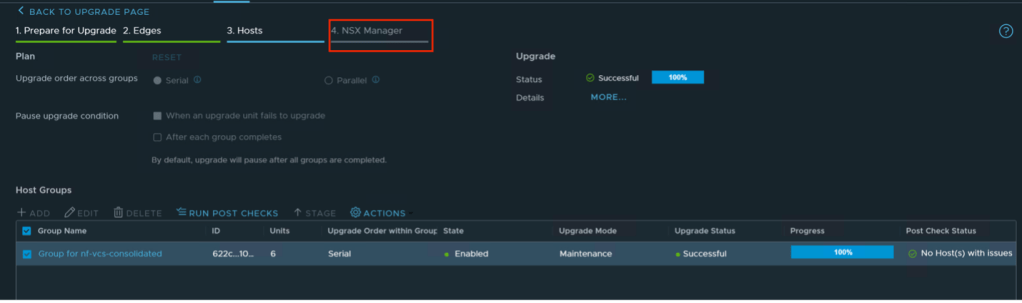
- Click on Hosts to continue with the upgrade.
- Click on the check box next to group name to select all clusters. Then click on start to begin the upgrade. Note that this upgrade will be placing hosts in maintenance mode and potentially rebooted. Upgrades can vary in time depending on the size of each cluster.
- One complete once again run the post checks by ensuring the host group box is checked and selecting run post checks.
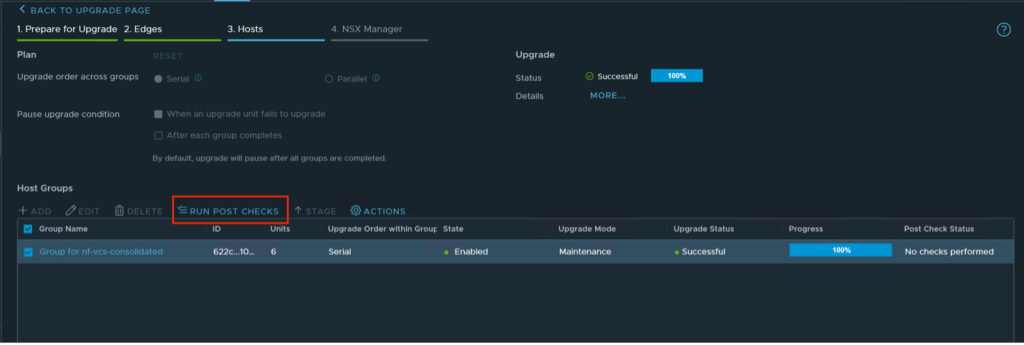
- A new window will appear asking you to confirm running the post checks. Click on run post checks to continue.

- Once complete if no errors are found the post check status will show No Host(s) with issues. We are ready to move to the next step.
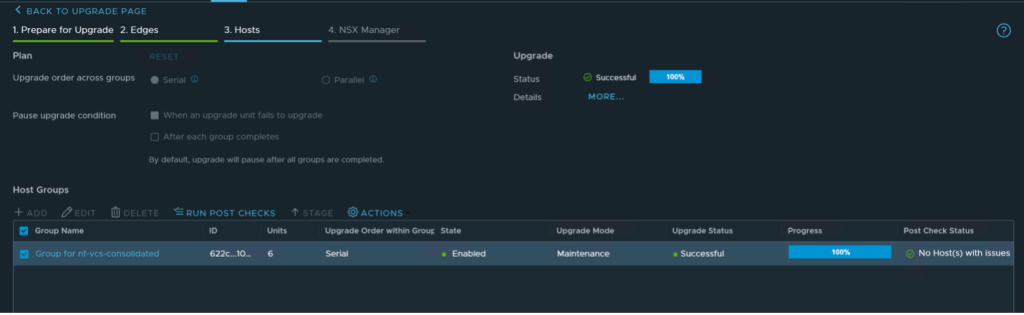
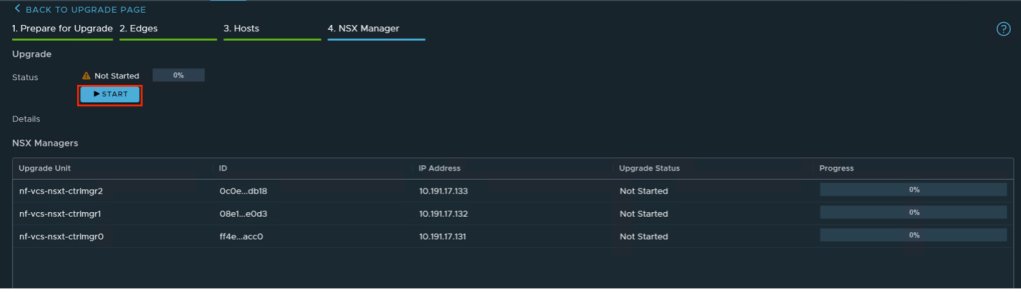
- Click on NSX Manger to move to the next step.
- Click on start to begin the upgrade process for NSX Manager.
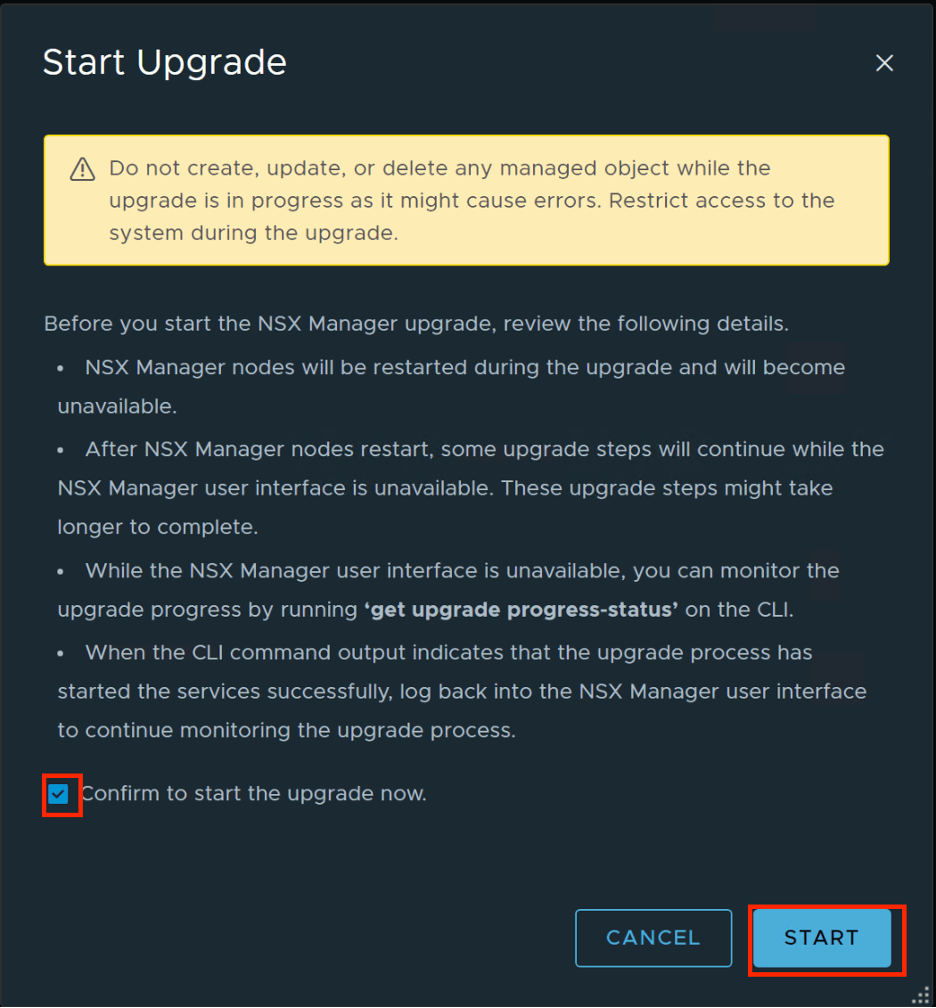
- Read the warning presented and click the checkbox next to confirm then start to begin the upgrade process. As stated, you may wish to log into the CLI to monitor status.
- Approximately 80% through the upgrade a new window will appear notifying you that the NSX Manager is rebooting, click got it to continue.
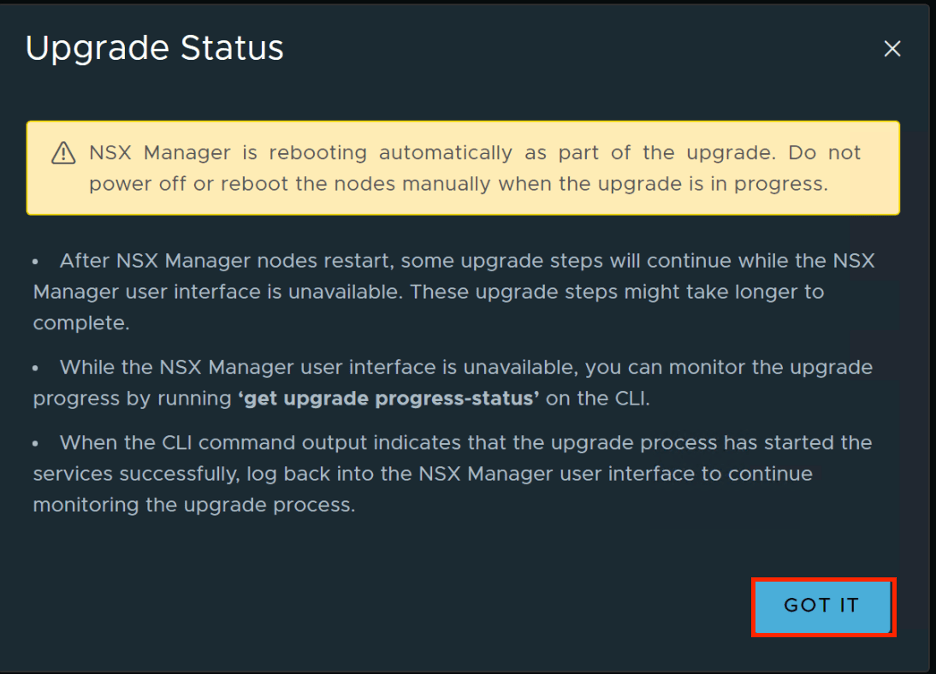
- During this next phase of the upgrade, you will be logged out of NSX Manager. When the login page appears, you may log back in to continue to monitor progress of the upgrade. Note that this upgrade process can take 30 minutes or more to complete.
- When complete navigating back to the upgrade tab will show the completed status.


Leave a comment