At VMware Explore 2022 Europe I was privileged to assist the team in announcing IBM’s new VMware offering – VMware as a Service. While this offering provides a great combination of the ease of a managed service combined with the security and performance of dedicated hardware, it also provides a great opportunity to take advantage of the advancements made in the last few years by VMware and the community to leverage Terraform and start from day one provisioning your infrastructure with code.
This tutorial, along with others to follow, is to guide you on the basic setup and configuration of Terraform to be able to provision resources in IBM Cloud VMware as a Service. In this tutorial I will take you through the basic steps of getting Terraform installed, configuring the provider, the variables required, and provisioning your first resource in VMware as a Service.
Download Terraform
To begin we need to download and install Terraform on our system. The Terraform binary can be downloaded from the Terraform website. Choose the operating system and package manager or binary download option as per the choice of your system. The screenshots in this tutorial are based on macOS. Apart from the setup of Terraform, the steps described in this tutorial are the same across all operating systems.
Once installed, you can verify that the installation works by checking the version by opening a command prompt and running terraform -v as shown below. When writing this tutorial, the latest version of Terraform was v1.3.7.

Install the Terraform Provider
NOTE: The code for this tutorial is available at this github repository.
Terraform implements a modular approach in its application architecture. The Terraform binary we downloaded is the core module required to perform core Terraform functions. Any operation or a CLI command that does not involve invoking any cloud or service provider API are core functions of this binary.
To work with a cloud provider or service, such as VMware as a Service, Terraform instantiates a corresponding module. It downloads the binary in the root directory of the project. For VMware as a Service we instruct Terraform to use a specific version of the VMware Cloud Director provider so that our Terraform project can provision resources in our VMware as a Service instance.
Now it is time to create our first Terraform project. Create a directory on your system and open this directory in the IDE of your choice. In the examples below we are using Microsoft Visual Studio Code All of your Terraform code goes into .tf files created in the root of this directory. Create a file named versions.tf into this empty directory and write the provider block as shown below.
terraform {
  required_providers {
    vcd = {
      source  = "vmware/vcd"
      version = "~>3.8.1"
    }
  }
}
Terraform uses HCL (HashiCorp Configuration Language) syntax. HCL is a declarative configuration language that helps declare the resources we want to provision using Terraform. In the versions.tf file, we have specified a terraform block, within which we have declared another block that represents required_providers.
required_providers contains an attribute vcd to which an object with a couple of properties is assigned. These properties define the source and desired version of the VMware Cloud Director provider. Therefore, the above code instructs Terraform to initialize the VCD provider with version 3.8.1. Save the versions.tf file. To initialize our Terraform project, run terraform init command in the root directory of the folder you created and observe the output as below.
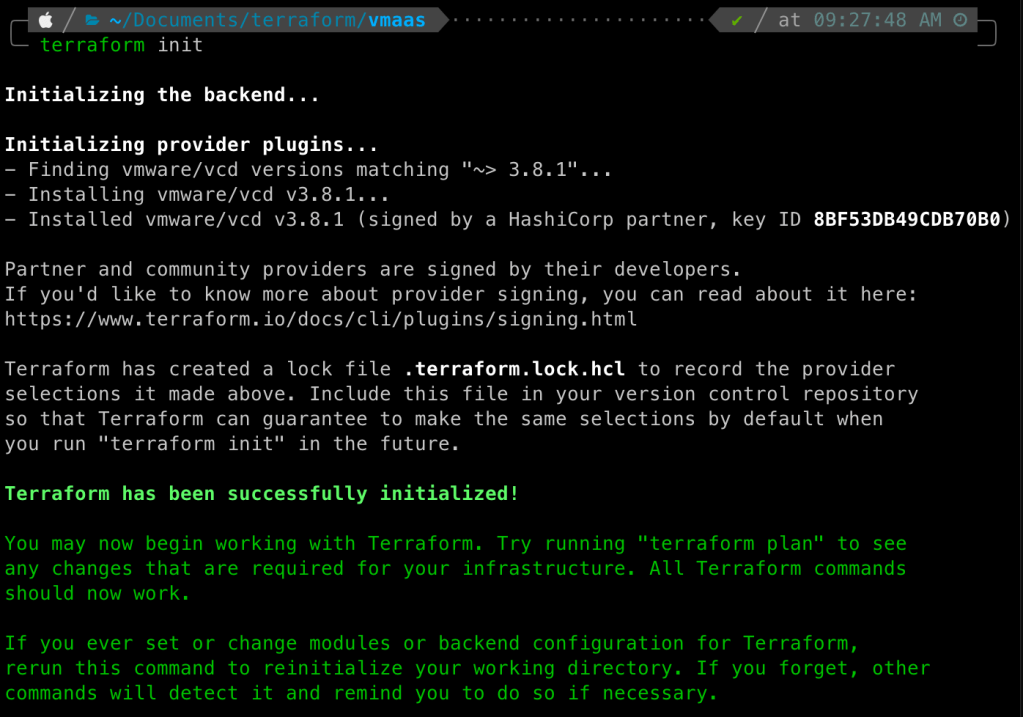
Terraform has successfully initialized the desired version of the VCD provider. If we look at our root directory, here is what it contains.
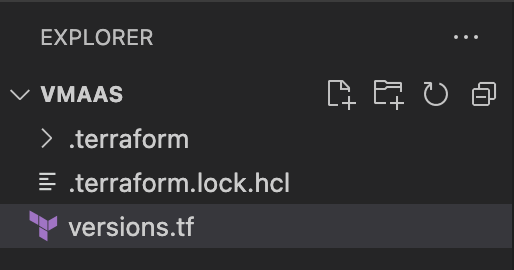
Along with the versions.tf file, we now have .terraform.lock.hcl file and a sub-directory named .terraform. The lock file here is used to manage checksums for the downloaded module binaries. The .terraform sub-directory is the target where the VCD provider plugin binary has been downloaded. If you have followed the steps successfully so far, this is how your directory should look.
At this point, we have installed the Terraform provider, but we have not configured it to work with our VMware as a Service instance. The next step configures the necessary values in order to access our VMware as a Service instance.
Configure the VMware Cloud Director Provider
In the previous step we told Terraform to utilize the VMware Cloud Director provider. However, to be able to connect to our VMware as a Service instance there are additional parameters we need to set, telling Terraform such things as what URL to connect to, what our user name is, etc. To do this we will create a second file, provider.tf, that will contain this information. Create a file named provider.tf and write the provider block as shown below.
provider "vcd" {
  user                 = var.vcd_user
  password             = var.vcd_pass
  org                  = var.vcd_org
  vdc                  = var.vcd_vdc
  url                  = var.vcd_url
}
There’s a lot of information here! What we are configuring here is the credentials we will need to connect. Let’s look at each item in turn.
user– This is the username for Cloud Director API operations. By default when your VMware as a Service instance was provisioned a user namedadminwas created for you to use. For Terraform you can use this user or (recommended) use another user.password– This is the password for the user listed above, and will be used to authenticate with the VMware as a Service instance.org– This is the VMware Cloud Director Org on which to run Terraform against. For VMware as a Service the organization has been created for you and can be found in the IBM Cloud portal. I’ll cover how to find this information in the following section.vdc– This is the virtual datacenter within VMware as a Service to run operations against. If not set the plugin will select the first virtual datacenter available to your Org.url– This is the URL of your VMware as a Service instance. I’ll cover how to find this information in the following section.
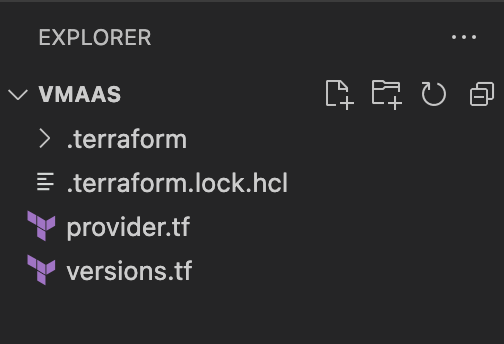
Save the file. Your directory should now look like the following:
So we have now setup the provider Terraform file and the versions Terraform file. However, if you look back at versions.tf you will need as opposed to inputing the values we defined variables such as var.vcd_user and var.vcd_pass. This is to make our Terraform reusable, and do not share our credentials with others.
To define our variables, we need to create two more files. First, create a third file called terraform.tfvars. Variables that are defined in the terraform.tfvars file are automatically loaded by Terraform when the VCD plug-in is initialized and you can reference them in every Terraform configuration file that you use. Because the terraform.tfvars file contains confidential information, do not push this file to a version control system. This file is meant to be on your local system only, and most version control systems have been configured to ignore and not push this file to a source control system (such as GitHub) if configured correctly.
Write the terraforms.tfvars as shown below.
vcd_user = "<user name>"
vcd_pass = "<user password>"
vcd_org  = "<vdc org id>"
vcd_vdc  = "<vdc name>"
vcd_url  = "https://<vdc_url>/api"
<user name> and<user password>should be replaced with what was either provisioned for you by IBM Cloud when you provisioned VMware as a Service or a user you have created manually inside of VMware as a Service.<vdc org id>and<vdc_url>can be found on the login page of your VMware as a Service instance. For the organization ID that is the string after “You are about to sign in to”. In the example the ID is 489ae92-9e72-4945-afce-dd8334a13b79. For the URL that is the first part of the URL in the address bar – starting withdalw. In the example the URL isdirw029.us-south.vmware.cloud.ibm.com.

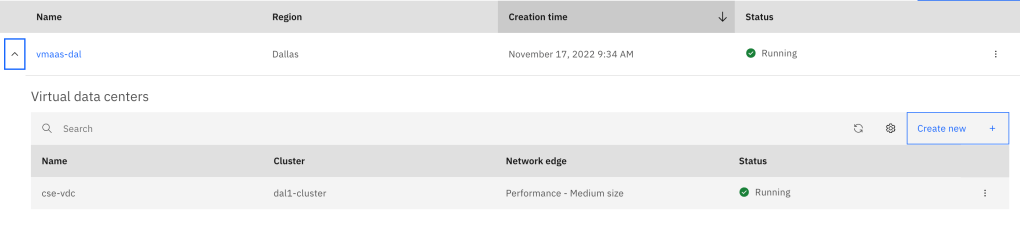
<vdc name>is the name of the virtual datacenter you provisioned as part of VMware as a Service. This information can be found in the IBM Cloud Portal. In the example belowcse-vdcis the name of the virtual datacenter.
Now that we have input our values in terraform.tfvars we can create our variables. Open up your IDE and create a fourth file, calling it variable.tf. Write variable.tf as shown below.
variable "vcd_vdc" {
  type        = string
  description = "This is the VMware as a Service Virtual Data Center for the environment"
}

variable "vcd_user" {
  type        = string
  description = "This is the VMware as a Service user."
}

variable "vcd_pass" {
  type        = string
  description = "This is the VMware as a Service password for the environment"
}

variable "vcd_org" {
  type        = string
  description = "This is the VMware as a Service organization string from the console for the environment"
}

variable "vcd_url" {
  type        = string
  description = "This is the VMware as a Service URL for the environment."
}
Save all files and back at the command prompt run terraform plan. This command looks at your Terraform files and compares them to the existing infrastructure, noting what will be added, removed, or changed if this plan is applied. If everything is setup correctly you should get the output as shown below.

So what does this mean? Simply put we have not told Terraform to make any changes to our configuration and so it is telling us just that.
Let’s change that! Open up your IDE one last time and create a new file named main.tf. This file is where we will declare the resources we want Terraform to manage. Write main.tf as shown below.
resource "vcd_network_isolated_v2" "isolated_network" {
  name          = "myTestNetwork"
  gateway       = "10.254.0.1"
  prefix_length = 24
}
What main.tf is declaring is to create a single, isolated network in your virtual datacenter.
Run terraform plan again and the output should be similar to below.
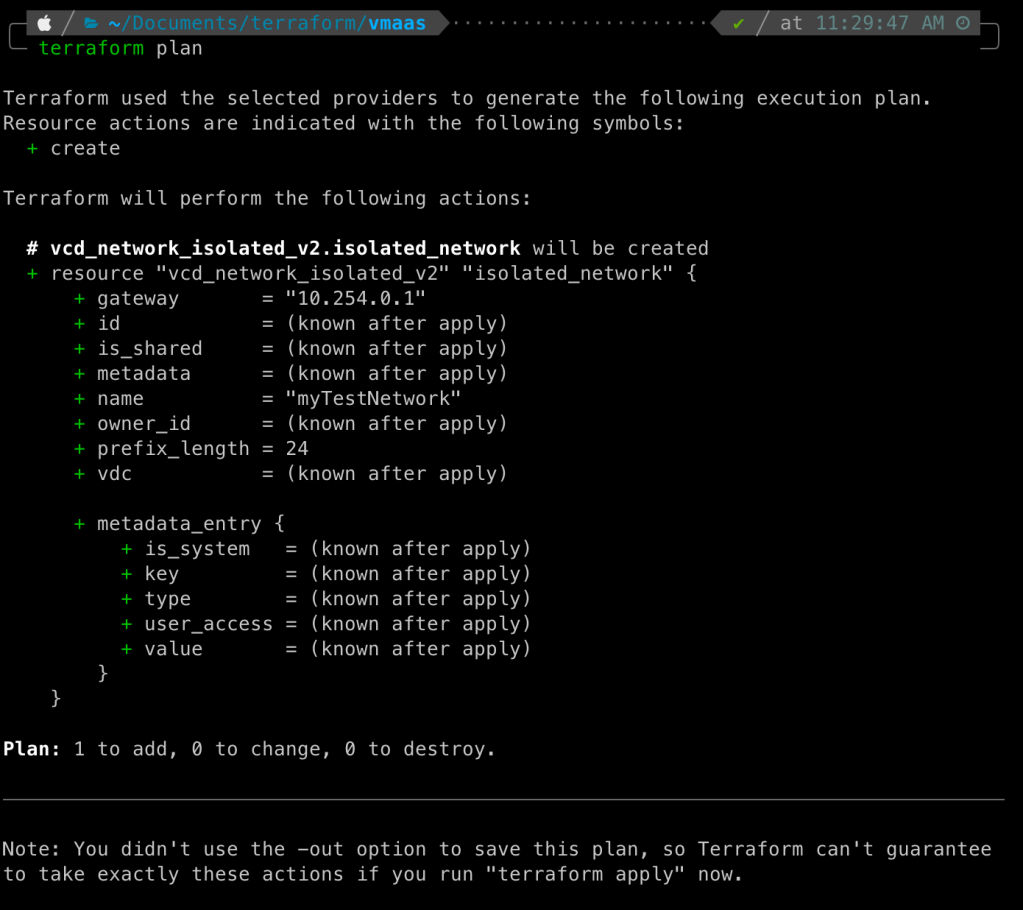
Terraform Apply (apply)
Now that we have verified the actions that Terraform will perform if we choose to execute this code, let us go ahead and create these resources. The terraform apply command helps us provision all the resources we have declared in the main.tf file. When you run terraform apply, it again highlights the output similar to the plan command, and asks for our final confirmation as below:

Type in yes and hit Enter.

Terraform starts to provision the isolated network with the attributes we have specified. For all those attributes which are not specified, it assumes the default value. As seen from the output, it took 12 seconds for Terraform to successfully provision our isolated network. Verify the same by logging into your VMware as a Service instance.

Congratulations, you’ve created your first resource in VMware as a Service using Terraform!
Terraform Destroy (destroy)
Terraform manages the full lifecycle of infrastructure. This also means, that if it is responsible for the creation of a particular resource, it is also responsible for its deletion or destruction. The Terraform destroy command helps us delete all these resources completely.
To delete the network created using apply, run terraform destroy to delete the network.

Here, it again asks for our confirmation with an output that highlights the resources which will be deleted. If we choose to say anything other than ‘yes’, Terraform will abort this operation. Since the plan summary correctly indicates that one resource will be destroyed – which is as per our expectations – let us go ahead and confirm the deletion.

As we can see, Terraform has successfully deleted the isolated network. This can be confirmed from the console as well.
The Terraform commands just discussed are the most important commands which every developer should be aware of. These commands are vital, in the way that they define the complete end-to-end lifecycle of the resources being managed via Terraform. In future posts I’ll cover more involved configurations.


Leave a comment