As part of the Cloud shared responsibility model, it is a client’s responsibility to ensure applications such as NSX are at the latest level. This document walks through the process of setting up an IBM Cloud Object Storage bucket to upgrade NSX.
For this solution a Cloud Object Storage instance and bucket is created, and the required upgrade file is uploaded to that bucket. Once the bucket is created optional context-based restrictions can be placed on the bucket to limit the system that can access the file.
This solution also allows for the ability to have the Cloud Object Storage instance in one account and be accessed by another, allowing a single uploaded file to be used in multiple accounts.
Note that this document does not guide through the actual NSX upgrade, only on uploading the necessary data to begin the upgrade process.
The steps are as follows:
- Create an IBM Cloud Object Storage instance in IBM Cloud
- Create an IBM Cloud Object Storage bucket
- Upload the NSX update file
- Locate and use the URL to perform an NSX upgrade
Note that prior to starting you should download the required update file from VMware.
Step One: Create an IBM Cloud Object Storage instance in IBM Cloud
The first step is to create an instance of IBM Cloud Object Storage in IBM Cloud.
To proceed:
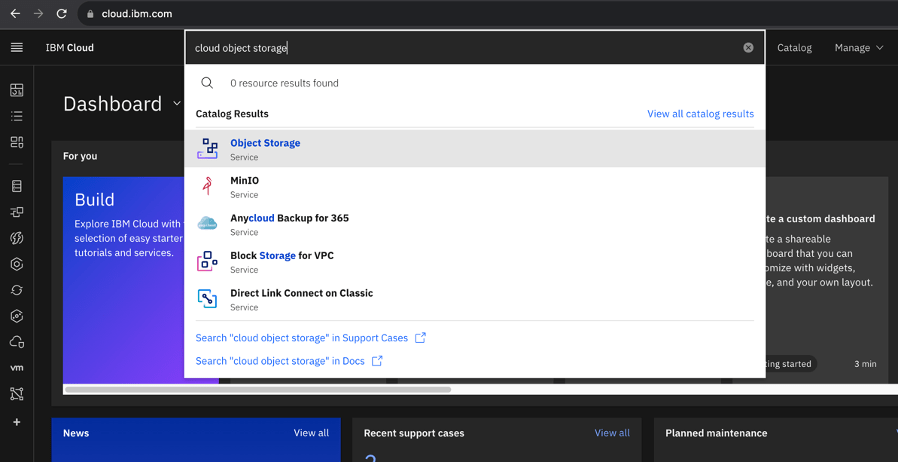
- From your browser log into IBM Cloud at https://cloud.ibm.com
- Using the search box in the menu bar, type cloud object storage and select the object storage service.
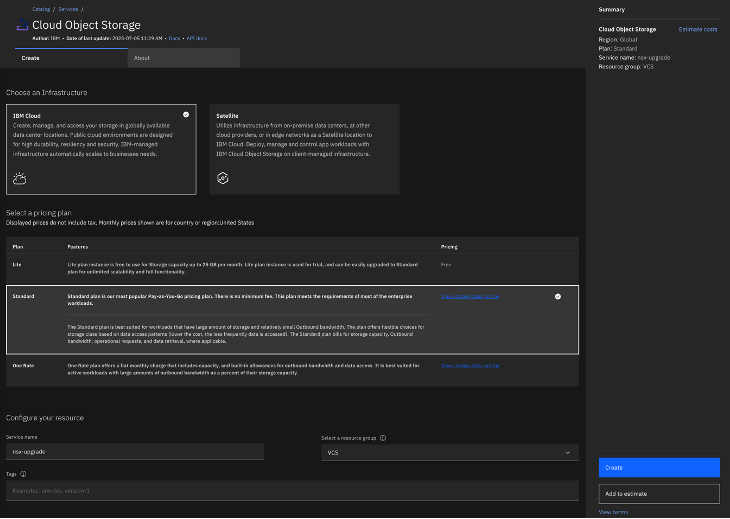
- Fill out the order form as follows:
- For Choose an Infrastructure, leave at default (IBM Cloud).
- For pricing plan, select Standard.
- For service name, create a memorable service name. In the example nsx-upgrade is used.
- Select a resource group. In the example VCS is used.
- Optionally, type in one of more tags.
- When you are satisfied click Create to create your Cloud Object Storage instance.
Below is an example of the filled-out form:
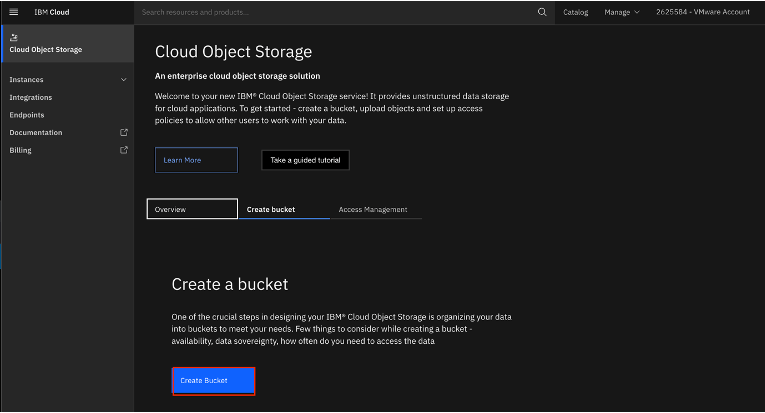
After a few seconds the screen will refresh and take you directly to the instance you just created. Stay on this page and move to the next step.
Step Two: Create an IBM Cloud Object Storage Bucket
The next step of this solution is to provision bucket in the Cloud Object Storage instance just created.
The steps are as follows:
- Staying on the page from the previous step, click on the Create bucket tab.

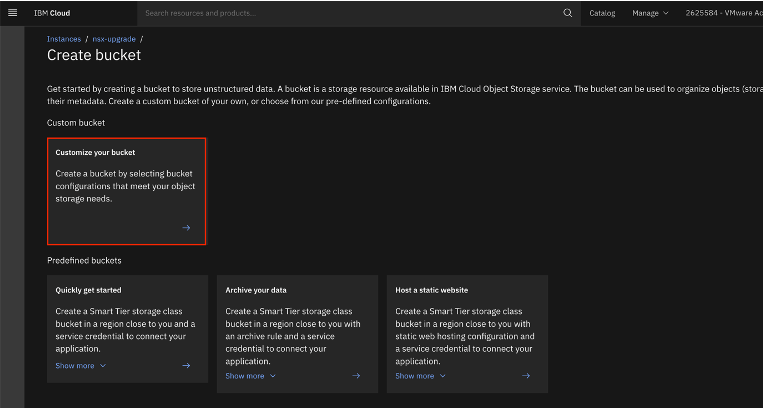
- Click on Create Bucket to begin bucket creation.
- Click on Customize your bucket.
- Fill out the form as follows:
- For Unique bucket name, select a name. In the example nsx-upgrade-bucket is used.
- For Resiliency, leave at the default (Regional).
- For Location, select a region closest to your VMware instance. In the example eu-de (Frankfurt) is used.
- Scroll down until you reach Static website hosting and click on Add+
- Click the toggle to turn Public access to On.
- A warning will appear about enabling public access. Click Enable to close the pop-up window.
- Under Index document, type index.html. Note that this is a placeholder as no index.html will be uploaded.
- Click Save to continue.
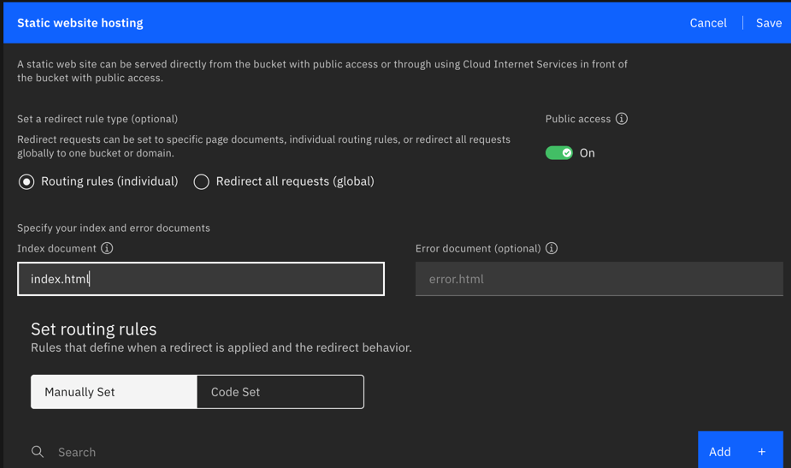
- Leave all other settings at default.
When satisfied with your inputs click Create bucket. It will take a few seconds for the bucket to be created. Once complete the page will refresh directly into the bucket.
Proceed to the next step.
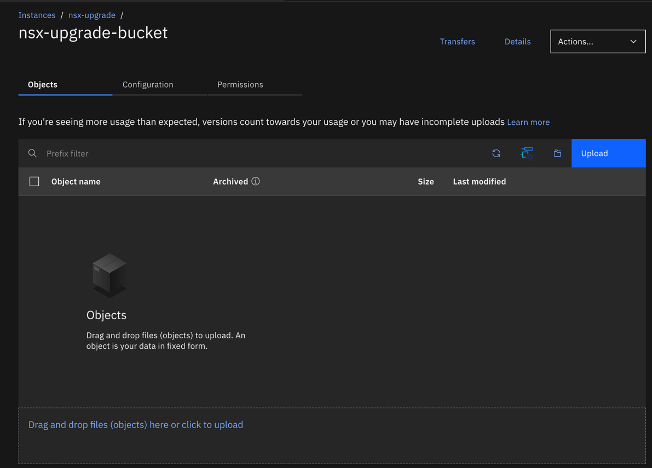
Step Three: Upload the NSX Update File
The next step is to upload the update file for NSX. As stated earlier it is assumed that the file has already been downloaded to the local workstation.
- From the bucket page, click on Upload.

- Switch the toggle to Aspera high-speed transfer. If this option is greyed out, then follow the instructions to install the Aspera client on your local workstation.
- Following the directions, either drag and drop or click to upload the update file.
- Once complete, click on Upload.

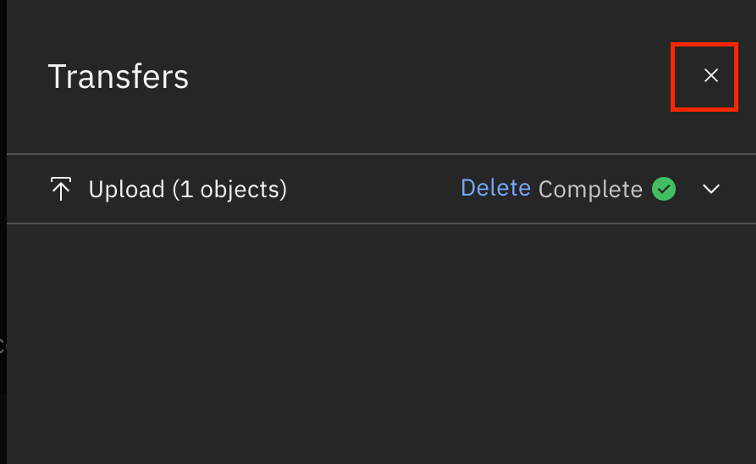
The upload will begin. Note that this can take several minutes depending on your network speed.
Once the upload is complete close the transfer tab by click on the X in the upper right corner of the fly-out panel and stay on this page to continue to the next step.
Step Four: Locate and use the URL to perform an NSX Upgrade
Now that the file is uploaded, we will get the URL needed to perform the upgrade.
- In the IBM Cloud Object Storage bucket page click on the ellipse to the right of your file and select Object details.
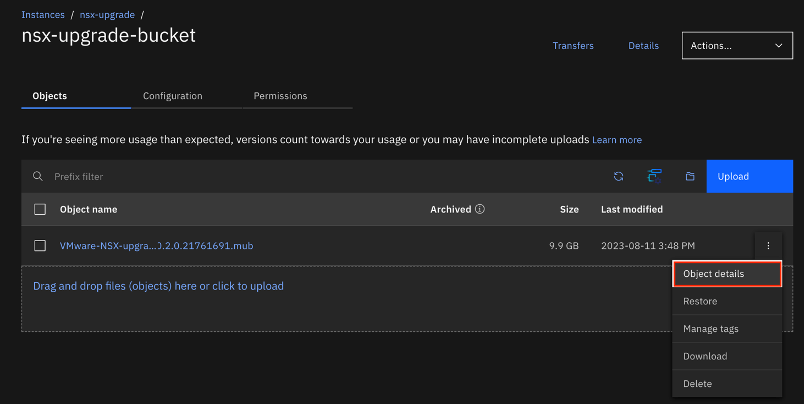
- On the object details fly-out, note and copy the Public URL for the file. In the example the URL is https://nsx-upgrade-bucket.s3.eu-de.cloud-object-storage.appdomain.cloud/VMware-NSX-upgrade-bundle-4.1.0.2.0.21761691.mub. Note that this is the Public URL. During the upgrade we will be changing this URL to reflect the private endpoint. However, if your NSX Manager does have public Internet access this URL can be used.
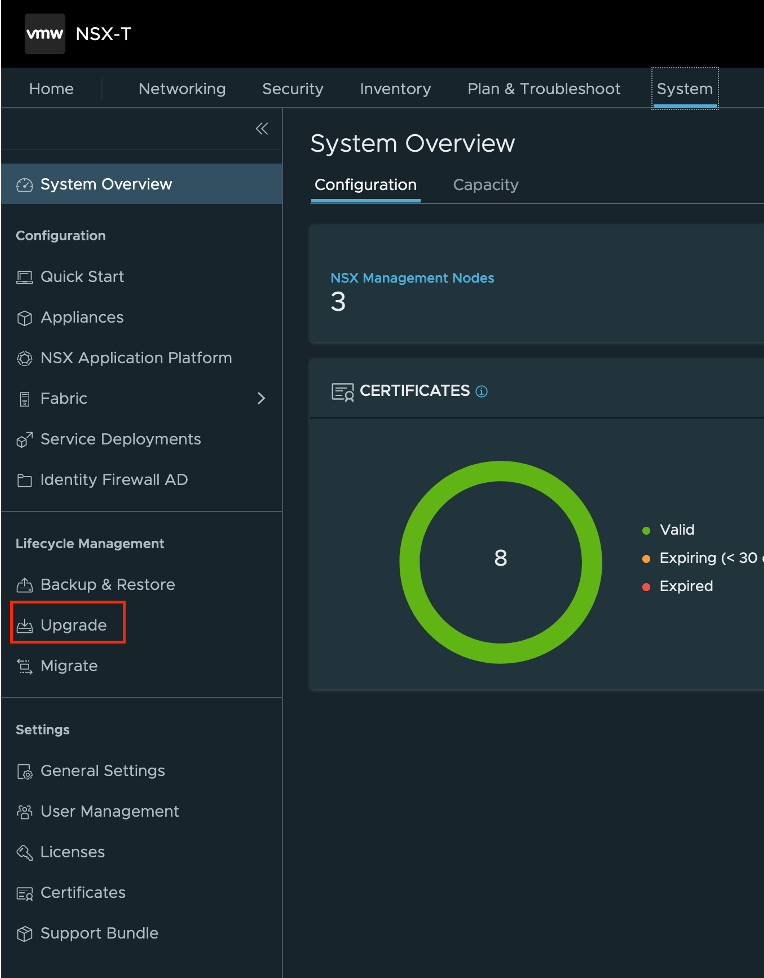
- Log into NSX and in the top navigation select System.

- In the left-hand navigation select Upgrade.
- Click on Upgrade to begin the upgrade process.
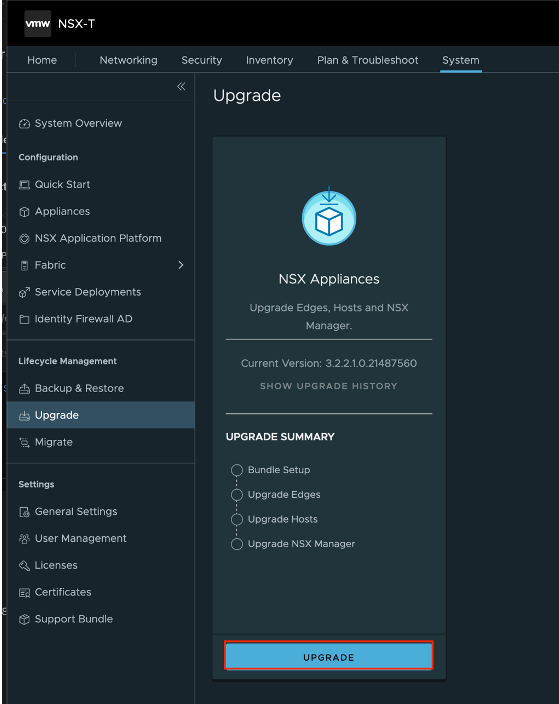
- Select Upload with URL and cut and paste the URL you saved from the previous step.
- If you wish to use the public URl click Upload. However, if you wish to use the IBM Cloud Object Storage private endpoint you need to adjust the URL.
- For reference, the example URL is https://nsx-upgrade-bucket.s3.eu-de.cloud-object-storage.appdomain.cloud/VMware-NSX-upgrade-bundle-4.1.0.2.0.21761691.mub. After s3 in the url add ‘-web.private’ (without the quotes). This is so the system will use the private endpoint as opposed to the public.
- Once the URL is correct click Upload
- Therefore from the example the correct URL is https://nsx-upgrade-bucket.s3-web.private.eu-de.cloud-object-storage.appdomain.cloud/VMware-NSX-upgrade-bundle-4.1.0.2.0.21761691.mub.
Here is the example configuration.

If the URL is correct the upload will begin as shown below:

Proceed with the NSX upgrade as directed.


Leave a comment